I built my first gaming PC in a basement with a screwdriver and zero confidence.
It crashed three times before I got Windows running.
You’re here because you want to build one too. Not because it’s trendy. Because you’re tired of paying $2,000 for a prebuilt that throttles at 60°F.
This is How to Build a Gaming Pc Pmwgamestation. No fluff, no jargon, no pretending you already know what a VRM is.
I’ll tell you which parts actually matter (and which ones manufacturers hype to squeeze extra cash out of you). You’ll learn how to seat an M.2 SSD without snapping it. How to route cables so air flows (not) just looks pretty.
You’ll make mistakes. I did. But you won’t need a degree or a tech friend on speed dial.
I’m not selling you anything. Just real steps. Real photos.
Real warnings about the one screw that will strip if you rush.
By the end, you’ll have a working PC. And the quiet satisfaction of knowing exactly how it ticks. No magic.
No mystery. Just you, the parts, and a clear path forward.
Plan Before You Plug In
I start with the budget. Not the dream build. Not the YouTube wishlist.
The actual cash I’m willing to spend.
That number kills half the options before I even open a browser. (You know it’s true.)
I go to How to Build a Gaming Pc Pmwgamestation when I need real-world part combos. Not theory.
CPU first. It’s the brain. I pick it based on what games I actually play (not) what streamers hype.
Then GPU. If I want 1440p high settings in Cyberpunk, I need more than a GTX 1650. If I play Stardew Valley and Rocket League, I don’t.
Motherboard has to match the CPU socket. No exceptions. I’ve fried a board by skipping this.
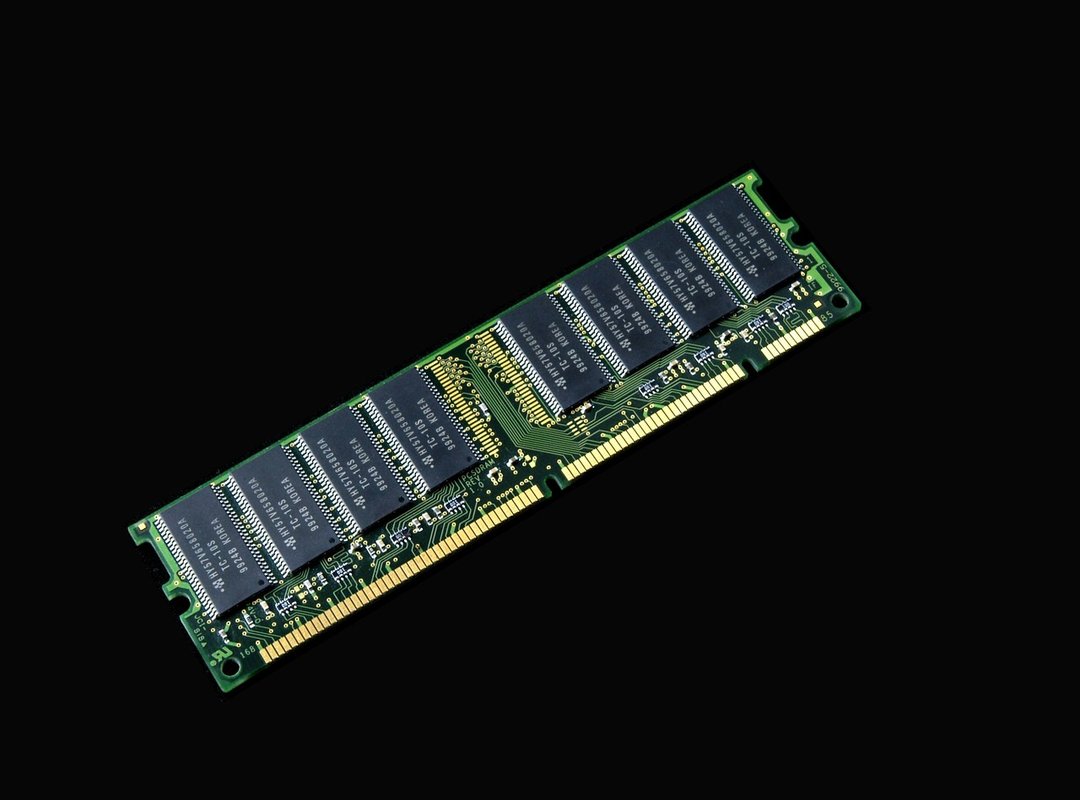
RAM? 16GB DDR4 is fine for most games. 32GB if I also edit video or run VMs.
SSD only for the OS and games. HDD only if I need cheap bulk storage for backups or media.
PSU isn’t where I cheap out. I get 80+ Bronze at minimum. A bad one can kill everything else.
Case matters less (but) airflow does. I check fan mounts and GPU clearance before I buy.
PCPartPicker.com catches 90% of compatibility mistakes. I use it. You should too.
What’s the last part you mismatched? Yeah. Me too.
Tools Before You Touch a Screw
I built my first PC on a folding card table. It worked. But I wish I’d known about the magnetic Phillips head screwdriver sooner.
That thing saves hours. You’ll drop screws. You’ll curse.
Then you’ll thank me.
An anti-static wrist strap? Non-negotiable. Static kills parts silently.
And yes (it’s) boring to wear. But replacing a $400 GPU is way more boring.
Clear off your kitchen table. No crumbs. No pets.
No half-drunk coffee next to your motherboard.
Open every box before you start. Check for bent pins. Count the screws.
Keep manuals within arm’s reach.
This is how to build a gaming pc Pmwgamestation. No fluff, no magic, just real prep.
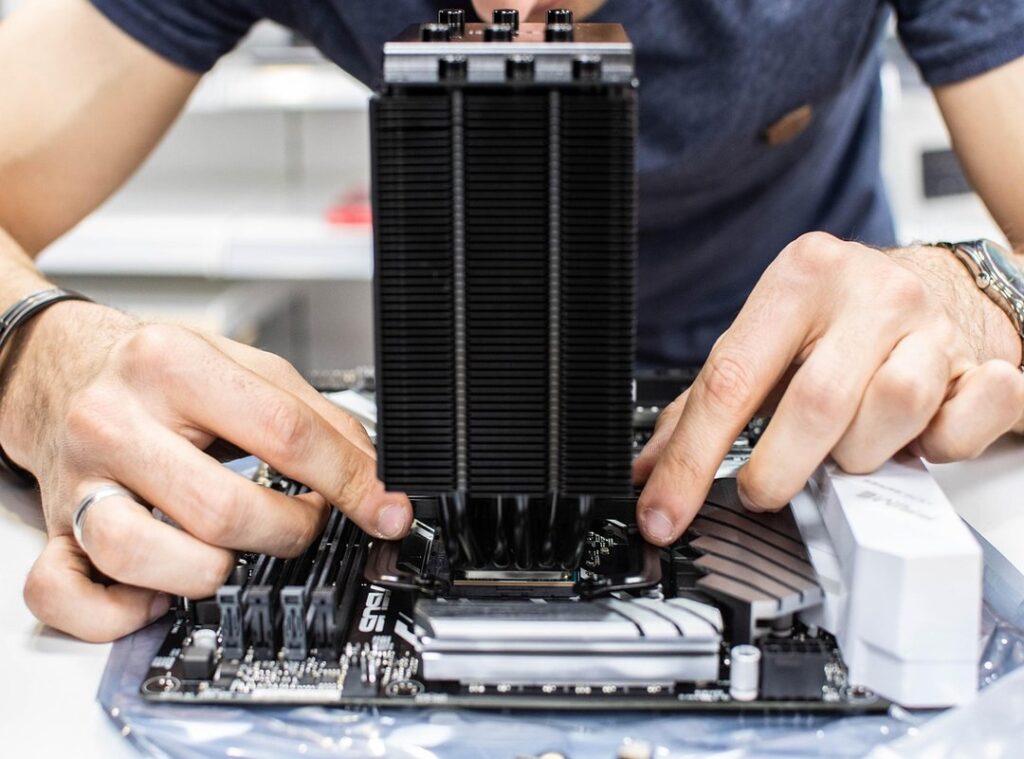
CPU, Cooler, and RAM: Get It Right or Restart
I drop the CPU in first. Always.
Lift the socket lever. Line up the arrow on the chip with the arrow on the socket. It only fits one way.
If it doesn’t drop in light as air. Stop. Forcing it breaks pins.
(Yes, I’ve done it.)
Then I close the lever. Firm but not furious.
The cooler comes next. Stock or aftermarket. You need good contact.
If your cooler doesn’t have pre-applied paste, I dab a pea-sized dot in the center. No swirls. No spreading.
Less is more here.
Mount it evenly. Tighten screws diagonally. Don’t crank one side all the way down first.
Or you’ll warp the CPU die. (That’s bad.)
RAM goes in last. Pop both clips open. Match the notch on the stick to the bump in the slot.
Press down hard on both ends until the clips snap shut. You’ll hear it. You’ll feel it.
Use two sticks. Not one. Dual channel isn’t optional.
It’s baseline speed.
You’re building a gaming rig. Not a paperweight.
If you skip this step right, everything else runs smoother. If you rush it? You’ll be reseating parts at 2 a.m.
Need help picking what actually works together? Check out the Guide to gaming monitors pmwgamestation. Same logic applies to parts compatibility.
How to Build a Gaming Pc Pmwgamestation starts here. Not later. Not after you’ve fried something.
Here.
Mount the Motherboard. Slot in the GPU.
I drop the motherboard into the case like it’s heavy glass. Because it is.
I line up the ports with the I/O shield first. That metal plate? It snaps in from the outside.
If it bends, you’ll fight the motherboard for ten minutes. (Don’t ask how I know.)
Standoffs go in next. Some cases have them pre-installed. Mine didn’t.
I screwed six in (four) corners, two near the CPU and PCIe slot. Skip one and the board shorts. You’ll smell it.
Then I lower the board slow. Screw it down with just enough pressure to hold. Not so tight the threads strip.
Now the GPU. I pop the PCIe clip. Slide the card straight in.
No wiggling. No forcing. If it doesn’t click, I pull it out and check the alignment again.
Screw it to the case. One screw holds it. Two is safer.
Power cables come last. My GPU needs two 8-pin plugs. I plug both (loose) connections cause crashes mid-game.
Not fun.
This is where most builds go sideways. Not because it’s hard (but) because rushing kills motherboards.
You’re doing this right now, aren’t you? Right after reading How to Build a Gaming Pc Pmwgamestation.
Good. Keep going.
Hook It All Up
I mount SSDs first. They’re faster and lighter than HDDs. (HDDs go in the bottom bays if you even use them.)
I plug in SATA data cables from drives to motherboard. Then I run SATA power from the PSU. One cable per drive.
No sharing.
The PSU goes in last (bottom) or top, depending on your case. I screw it in tight. Then I connect the 24-pin ATX cable to the motherboard.
And the 8-pin CPU power cable. That one’s non-negotiable.
Front panel cables? Yeah, they suck. Power button, reset, USB, audio (all) tiny and unlabeled.
I check my motherboard manual every time. Pin layouts differ. Mess it up and the PC won’t turn on.
Cable management isn’t optional. I use velcro straps. Not zip ties.
I reuse them. Better airflow. Less dust.
Easier to clean later.
You’re almost done.
No, really. You’re almost done.
This is where most builds stall. Not from confusion. From fatigue.
You’ve been focused for hours.
Want proof it’s worth it? Check out Why Is Gaming Good for You Pmwgamestation.
How to Build a Gaming Pc Pmwgamestation ends here (but) your first boot starts now.
You’re Done. Go Play.
I built my first PC in a garage with a screwdriver and way too much confidence.
You just did the same thing.
That power button? It’s not magic. It’s yours.
You saved money. You learned something real. You own every part of this machine.
No middleman, no mystery.
Still stuck on How to Build a Gaming Pc Pmwgamestation? Good. That means you’re ready to do it again.
Faster, smarter, bolder.
So what’s stopping you from installing Windows right now?
Or loading up that first game?
Don’t wait for permission.
Your rig is ready.
Go play.